The Hyperlane development flow
As mentioned before, every Hyperlane project comes with 3 separate environments: Development, Staging and Production. Hyperlane introduces a best practice development workflow that enables you to develop in a structured way and test new features with the latest content from the Production environment. Gone are the days of cowboy coding, deployment nightmares and Friday afternoon downtime.
Using Hyperlane, you can develop and deploy with confidence. You can implement new features at hyperspeed, delighting your customer.
Step 1: Developing a new website
Every project starts on the Development environment. You and your team collaborate on the cool project that has been awarded to your Agency.
Once you are finished, it is time to showcase it to your customer. The Staging environment is made just for that: enabling your customer to test the site in a dedicated environment.
On Hyperlane, you first have to enable the Staging environment. Once it has been set up, it is time to Clone the project from the Development to the Staging environment.
Hyperlane offers the ability to Clone websites between the various environments. What’s more, the user is able to separately clone code, content and database. More on that in a bit.
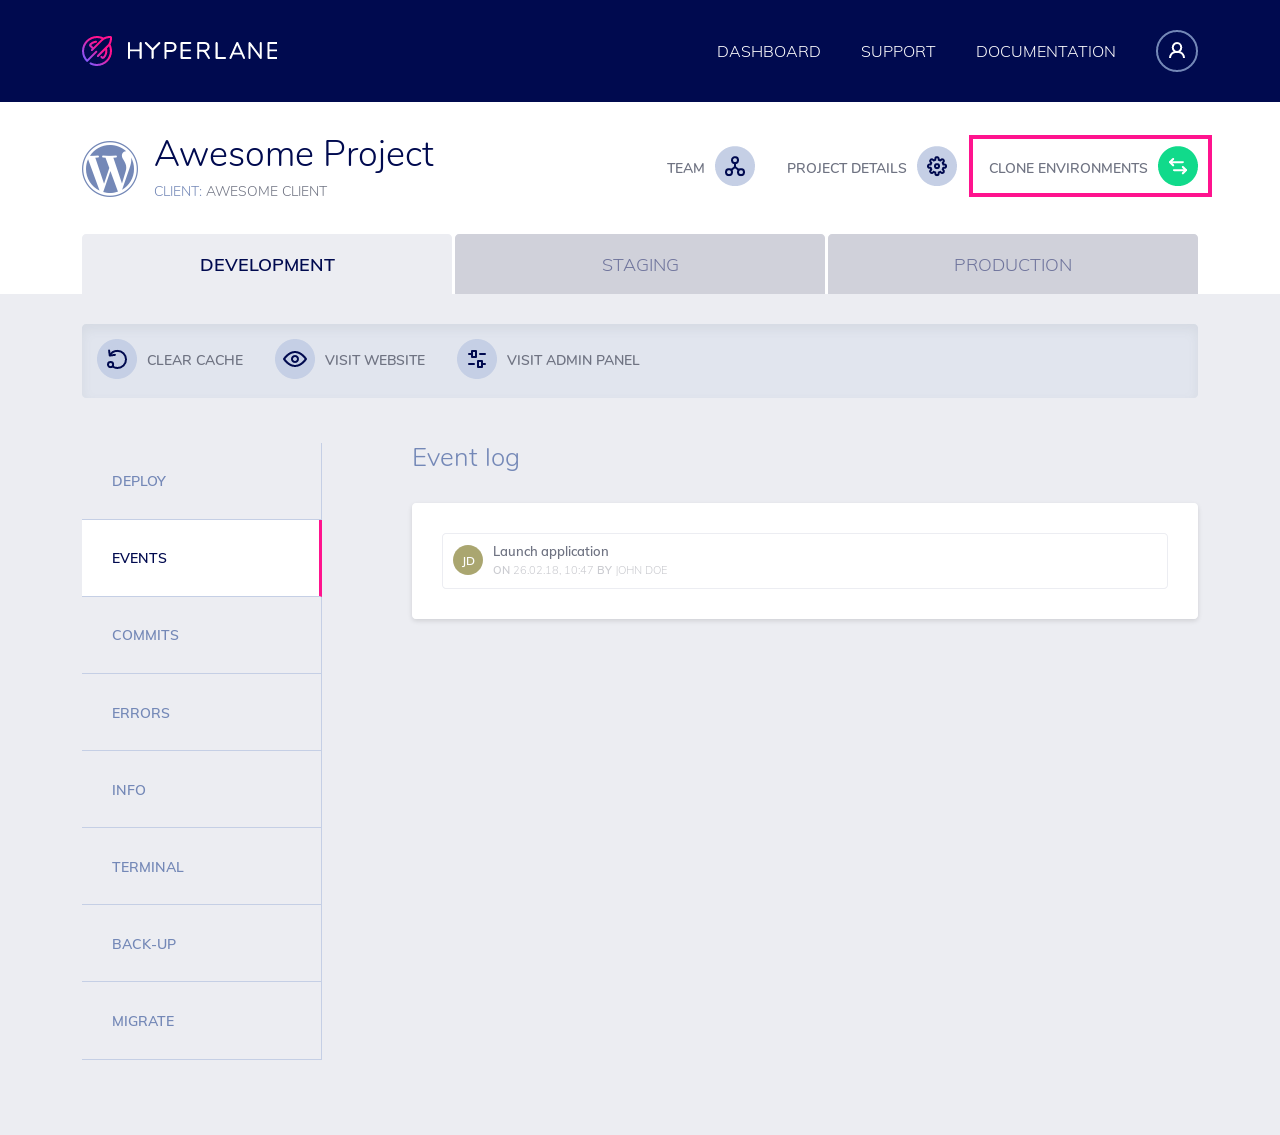
Click on CLONE ENVIRONMENTS.
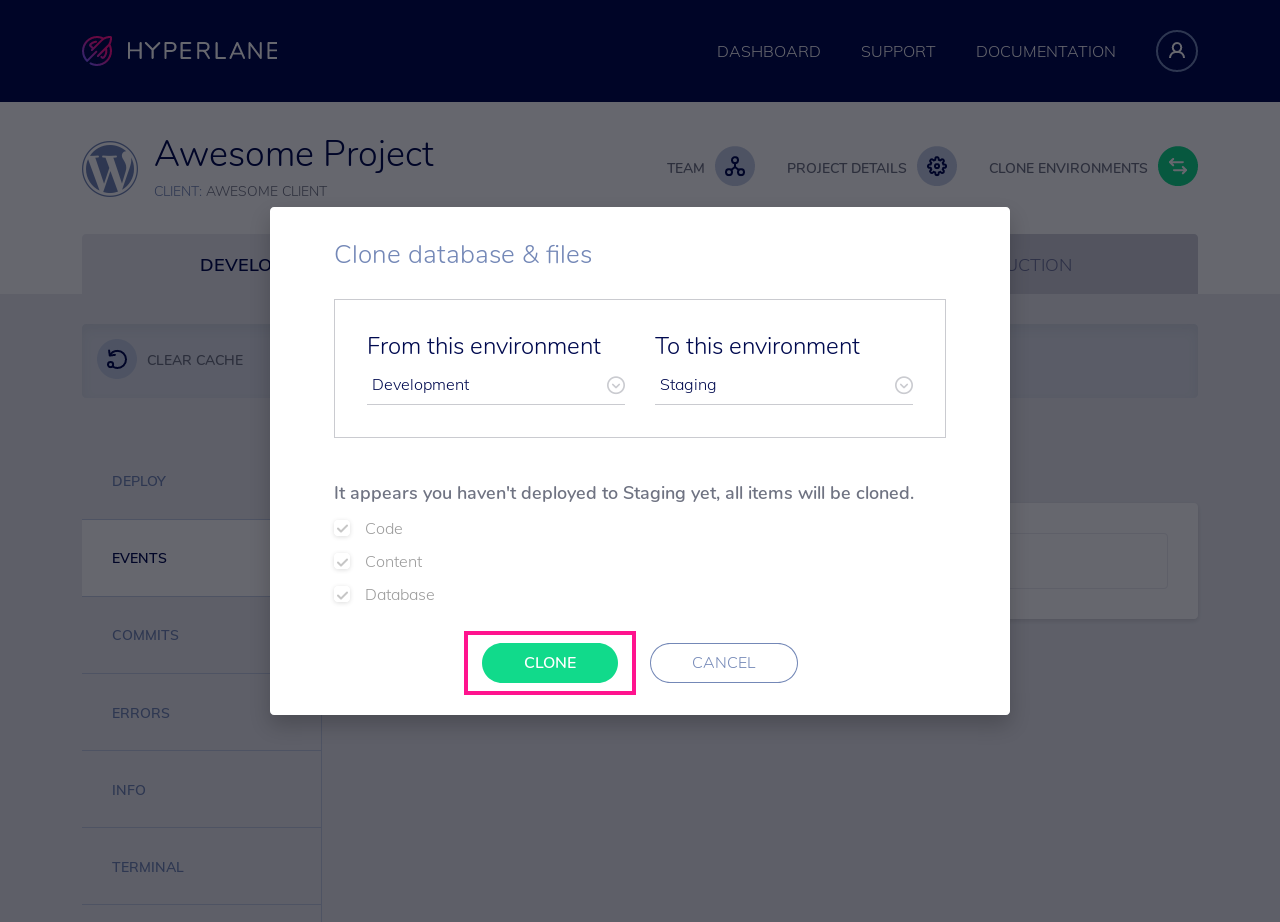
As this is a new project, you haven’t deployed to Staging yet so all items (code, content and database) will be cloned. Press CLONE and go check out the Staging environment.
There is now an identical copy of your website, right there. Share the website URL with your client and have him/her test your work.
After validation (after some iterations), your site is ready to go live. The Production environment is the right place for that. In order to enable the Production environment, you have to upgrade your plan from free to paid. More on that here.
Once enabled, repeat the Cloning process outlined above. Your Production site is now running on one of our blazing fast cloud servers!
One final step before you can launch the new site to the world is managing DNS and Security. More info on that can be found here.
Step 2: Updating an existing website
The Hyperlane workflow is perfectly suited to update existing websites in a timely and secure way. Your client may request a new feature or one of the plugins needs updating. However, as the Production environment has been filled with content generated by the client and other website visitors, deploying code changes directly on the production is extremely risky and will probably lead to broken pages, or worse, downtime. At Hyperlane, we suggest the following best practice to manage this.
Code changes are done by your team on the Development environment. Once ready, you push this code “up” from your Development to the Staging environment using our Clone functionality.
Afterwards, you Clone recent content “down” from your Production environment. This way, your new code can interact with the most recent content. Check whether everything is working as expected, fix potential bugs and have the updated site validated by your customer.
After passing review, you push your new code “up” from the Staging environment to the Production environment.
By using this workflow, unexpected surprises are limited to the bare minimum and deployment hell is a thing of the past!