Migrate an existing Craft 3 website to Hyperlane
Video tutorial
The guys over at craftquest.io have created a full course on Craft hosting with Hyperlane. Follow step 7 of this course on how to move an existing Craft website over to Hyperlane. In just over five minutes they show every step on how to achieve this. A step-by-step guide is available below.
Step-by-Step guide
-
Create a new project and choose 'Craft 3' as application type. Make sure to add the base install to your Hyperlane Git.
Note
Before moving on to step 2, your Hyperlane Gitlab account must have been set up. See how to setup your account right here.
-
Clone the repository to your local environment.
- Open the project in Hyperlane and go to the 'Info' tab of the Development environment.
- Copy the Git repository URL to your clipboard.
- Clone it somewhere on your local filesystem (e.g. ~/development).
git clone https://git.hyperlane.co/personal/john-doe/awesome-project.git
-
Copy the files from your current site to the cloned Git directory.
- Remove everything from this directory, except the
.gitdirectory and the.gitignorefile. (update the.gitignorefile if necessary) - Add all the files from your existing site, except the
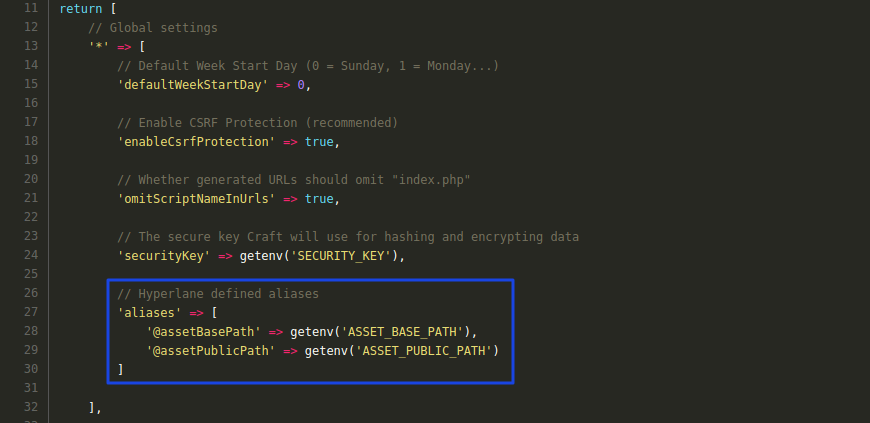
.gitdirectory and the.gitignorefile. - When you are working asset sources (see configure asset sources for Craft 3),
you must include the Hyperlane defined aliases in the config file.
Note
Do not add your assets (images, files, uploads, ...) to the repository! If you want to make full advantage of the Hyperlane development flow, you should make sure your assets do not reside in Git, but are stored in the content volume of your project on Hyperlane. See step 6 of this guide how to achieve this.
- Remove everything from this directory, except the
-
Commit and push all changes.
git add .git commit -m 'Add all files of my awesome site.'git push origin master
-
Import the database via PhpMyAdmin.
- Create a database dump of your current site. This can be done in the Craft admin panel or any database tool.
- Open the project in Hyperlane and go to the 'Info' tab of the Development environment.
- Copy the database username and password and open PhpMyAdmin.
- Import the database dump created in step 5.a.
Note
Before moving on to step 6, your SSH key must be added to your account. See how to get access via SFTP right here.
-
Upload all the assets via SFTP.
- Open the project in Hyperlane and go to the 'Info' tab of the Development environment. Enable SFTP.
- Activate your SSH key when SFTP was already enabled and your key was not yet added.
- Connect with an SFTP client using the credentials shown in the info tab and your SSH key.
- Upload all files to the correct asset paths.
- Open the project in Hyperlane and go to the 'Info' tab of the Development environment. Enable SFTP.
-
Deploy code via Hyperlane.
-
Visit your website!